6 Mistakes to Avoid When Changing Engine Oil
An oil change is a crucial auto maintenance job. While you can call an expert to change your engine oil, doing it yourself will save you money and help you understand how your automobile works. The procedure is pretty straightforward, but it’s best to be cautious and learn what it takes to perform an oil change successfully. Before listing the common oil change mistakes, let’s understand why changing car oil is essential.
Why are car oil changes necessary?
Engine oil circulates through the engine to keep its components lubricated. This lubrication helps the parts move smoothly and reduce friction as the car runs. Without oil, the higher friction between the engine’s components would quickly reduce mileage and performance, affecting the life of the automobile. However, the oil’s ability to reduce heat and friction reduces with time. It usually becomes darker in color and thicker, indicating it’s time for an oil change.
Common mistakes when replacing car oil
Here are a few mistakes to avoid if you’re changing your car’s engine oil by yourself without assistance from oil change services:
Not using a drain pan
A drain pan is a container into which used engine oil is drained. It helps avoid messy spills on your garage floor and allows you to transport the oil to recycling centers. Numerous styles of drain pans are available on the market, but the three most popular options are open-top, funnel-top with a drain spout, and semi-open with a drain spout. Funnel-top is perhaps the best design; it ensures the oil inside is completely covered, reducing the danger of oil spillage.
Regardless of the type of drain pan you choose, ensure it’s simple to slip under and out of the car without spilling. The height of the drain pan matters, since you need to reach inside to remove the oil drain plug. Pro tip: If you have a service lift, buy tall drain pans with wheels for extra convenience.
Not investing in a good grip
Removing oil filters can be exceedingly challenging with your hands smeared in oil. Thankfully, various tools are available for removing them without much effort. The most widely used tool, though, is a wrench. Wrenches come in numerous designs and variations, ranging from cap-style to three-jaw adjustable wrenches, to suit your requirements and price range.
A cap-style wrench is a size-specific wrench, meaning it can only be used to remove oil filters of a particular size. So, you’ll need a variety of these if you have multiple cars and intend to change the oil in all of them. Cap-style wrenches work well, and a lack of adaptability may be the only drawback. Most cap-style wrenches have a hex head that may be rotated by a 3/8″ square drive wrench for use with a ratchet.
A clamp-style wrench is another option to consider. These have a spring-steel clamp that tightens up to grip the filter. Although effective, clamp-style wrenches can be challenging to use in small engine bays and after they become slippery.
Tightening the drain plug incorrectly
Despite how easy it may seem, it is common to tighten the drain plug incorrectly. Before re-filling new oil, you must secure the drain plug in the right manner. Leaving it loose can increase the risk of an oil leak, while overtightening can damage the drain plug, oil pan, or oil filter. If you’re unsure about this, do a little research or seek guidance from the employees of oil change services near you.
The best way to go about the plugging process is to first remove any sludge from the magnetic tip of the drain plug and then gently re-thread it into the oil pan with a wrench that works best. If you encounter resistance when threading the drain plug into the pan, pause and make sure it’s going in straight. A little touch can help you avoid the undesirable situation of cross-threaded oil drain plugs. If you need to replace the drain plug, you can visit a quick lube oil change service near you.
Choosing the wrong filter
Choosing the right filter is as important as selecting the right oil. It may seem like a smart idea to combine high-quality oil with an economical filter to reduce the cost of your oil change, but the results aren’t worth the slight price difference. High-quality oil filters, although a little more expensive, provide better performance in the long run. They’re the best choice if you’re someone who doesn’t replace engine oil diligently every 3,000 miles.
Letting the new filter seal dry
This is a standard error inexperienced people make. Putting on the new filter seal while dry results in poor fitting. The filter may eventually unthread itself and spill the engine’s vital fluid on the floor. So, when installing a canister oil filter that faces up, sprinkle some oil over the seal after filling the filter roughly halfway. On canister oil filters facing downward, apply a tiny amount of new oil to the filter seal. For cartridge oil filters, lubricate the oil filter housing cap and any O-rings on the cartridge.
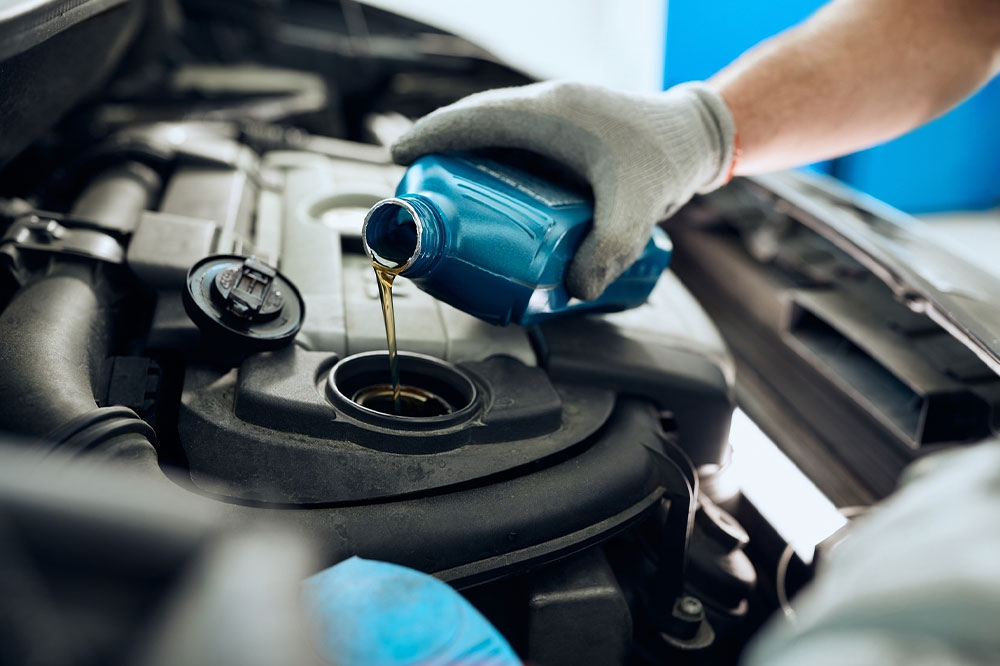
Not checking the dipstick
Always check your car’s handbook to determine the oil quantity required. You might be astounded by how little oil some modern engines can hold. To ensure you fill an adequate amount of oil, check the level after adding the second-to-the-last bottle and recheck after emptying the last one. You might need to add a portion of another container to fill the engine because not all engines hold exactly four quarts.
If you find replacing engine oil difficult, don’t hesitate to visit an oil change service near you, such as Quick Lane and Valvoline Instant Oil Change (VIOC). You can also visit the official service outlets of your car manufacturer. For instance, if you own a Ford, you can visit an official Ford instant oil change center.